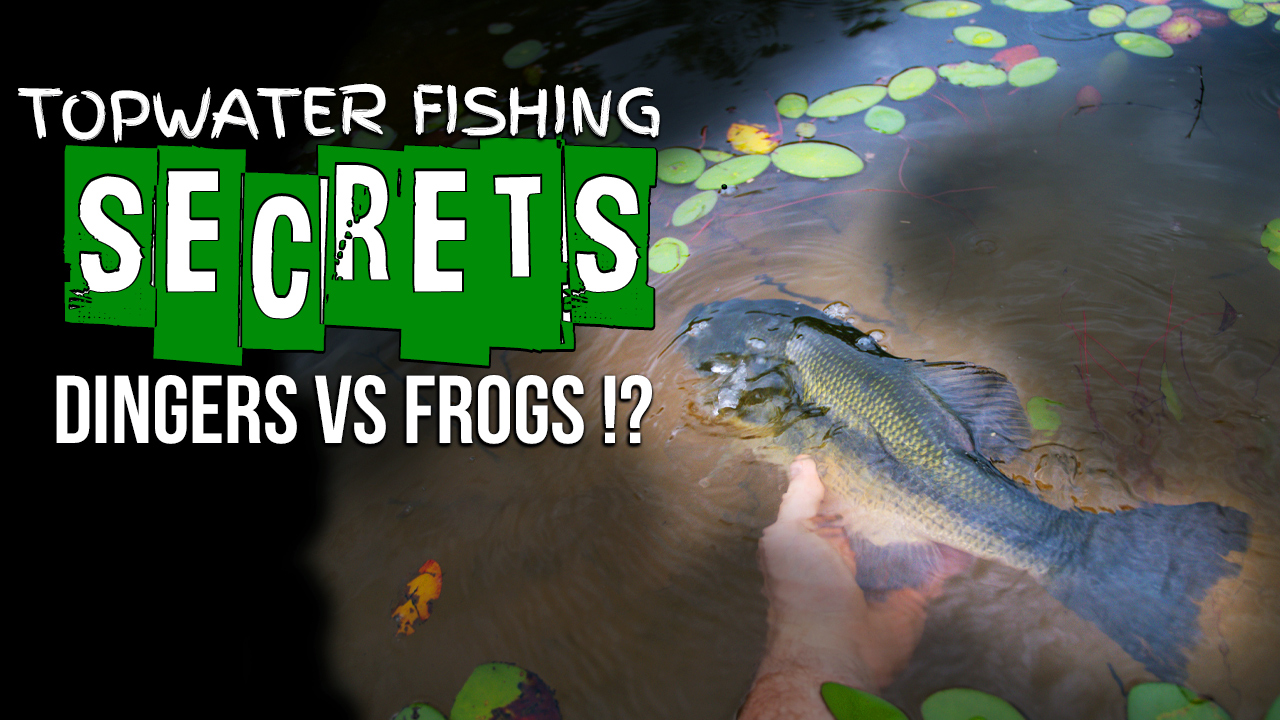
Notice the back has a killer design. Dang! That’s SWEET! And as you work it over the muck and the pads… the bass are going to see… the white belly (if anything)…
That’s not bad, but it’s something to be mindful of when you are selecting your topwater. And sure, bass that see the frog at an angle might notice part of the top. If it rolls (not ideal) on the retrieve, they might be able to catch a glimpse… but for the most part if you go with a bait like this you’re simply throwing a white frog.
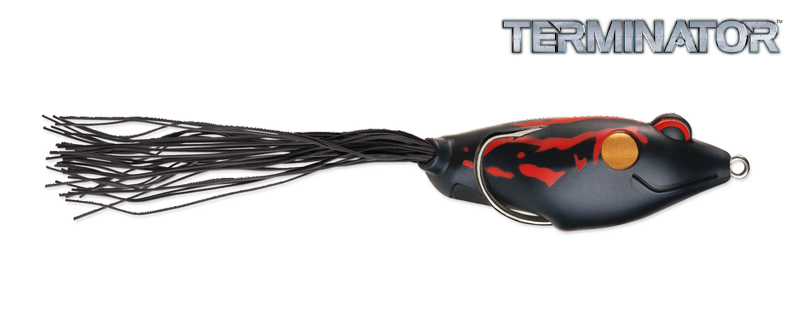
This Terminator Frog has some accent colors on top, but the entire body is black. Hence, you’re throwing a black frog.
This means you can probably minimize your frog box and focus on quality, not quantity.
2. In mucky water, the bass don’t care what your topwater looks like.
Say again?
If bass are set up below thick mucky algae, they don’t care what your bait looks like, because they can’t see it anyway. This is true when the water below the algae is clear, and even more true if the water is stained, tannic, or straight up pea soup.
They are reacting to the commotion – the movement – the easy meal.
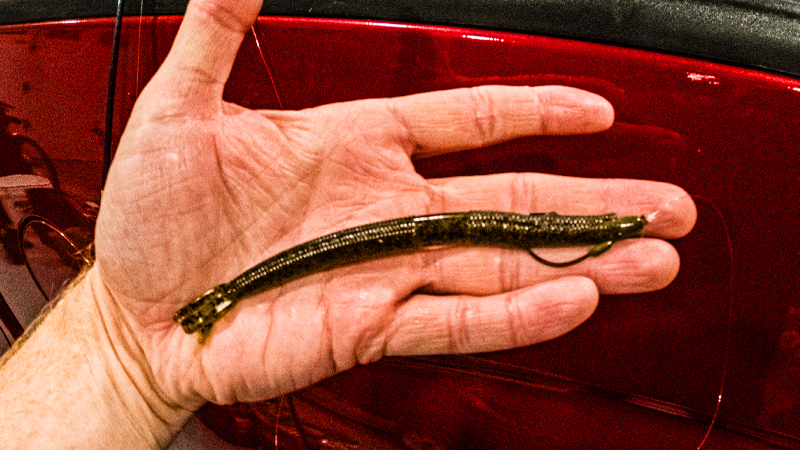
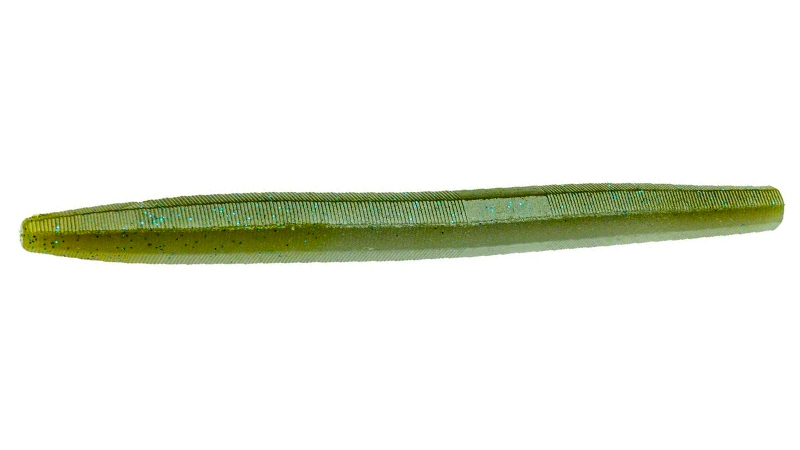
Because of this, one of my favorite ways to target these bass is with a 4″ or 5″ Yum Dinger rigged weedless and weightless on a 3/0 or 4/0 EWG.
New honey hole with muck near shore, pea soup for water, and healthy bass.
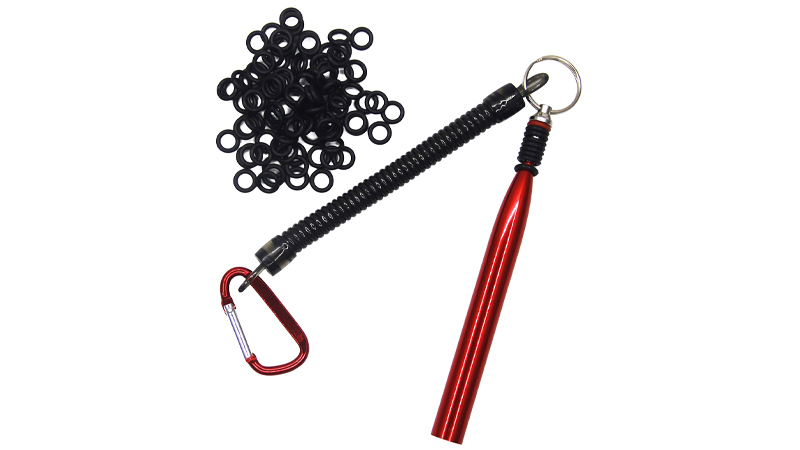
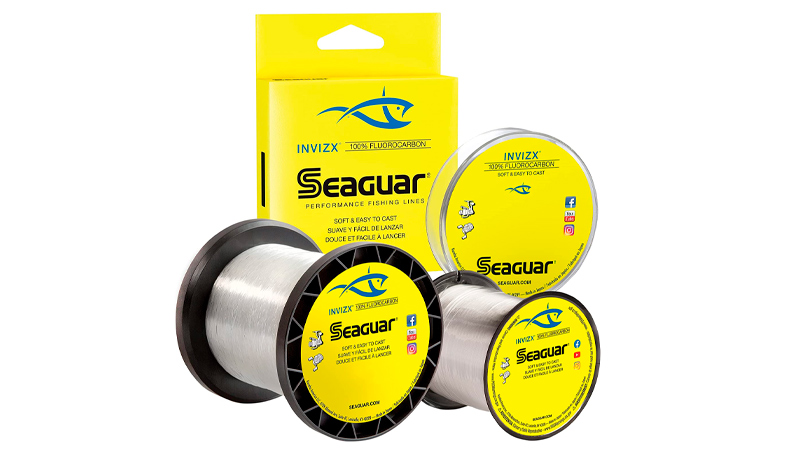
Here is the gear I use when I’m rigging a Dinger on an EWG, including my mainline (braid floats) and my leader material (fluorocarbon line gets snagged up less than braid and is abrasion resistant).
As you can see, this is different than the gear that comes into play for throwing straight wacky worms around weeds or sparse cover. When I’m not fishing around muck, I’ll completely skip a weed guard on the hook to stay as invisible as possible, crisscross 2 o-rings to rig perpendicular to the bait which increases hookups, and go with a thinner fluoro with less memory:
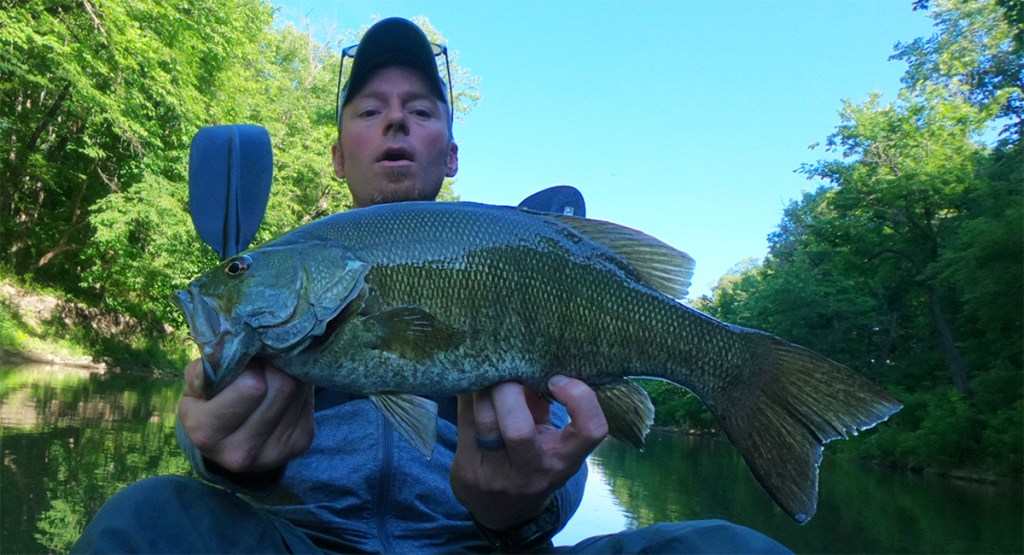
When you throw a Dinger topwater, it’s essentially a weightless Texas rig. Slow-sinking, yes, but not heavy enough to punch through the mats. However, when you reach the edge of the mat, pull it off and let it slowly sink for a second or two. Often times bass that are watching the movement above will gladly shoot out and smoke the slow-sinking stickbait as it drifts right in front of their face.
That is… if they haven’t already SMACKED it right through the thick of it!
Largemouth Bass Strikes a Topwater Stickbait thru Muck
Quick Trip: Topwater Dingers in the Muck
I keep a selection of both floating and sinking stickbaits in my Base Box for Fishing Muck, but it’s also important to remember as a Minimalist Fisherman our goal is to travel as light as possible. On kayak trips when we can only select a handful of baits, frogs take up a lot more room that stickbaits.
They’re also less versatile.
FACT.
You can hit every depth with a stickbait, provided you have a few sinker & hook options.
Your support directly funds the creation of weekly articles and videos that promote the development of better anglers and better men. Our country (and our kids) need both. Please share this site, and consider a monthly, weekly, or one-time donation. You are helping us make a difference!
We’re at it again! It’s early and I’m sitting in the main room of the boathouse that rests on the shore of the Manitowish Chain O Lakes to begin this article, coffee in hand, thinking about all the different ways to approach the fishing these next two weeks. We had big storms last night, and there’s something amazing about the way thunder cracks and echoes up and down the chain. It’s extra sharp. Crisp. A snap, a pause, a boom and that long, long rumble before it disappears completely back into the ether…
Snap… … … … BOOM!
Last night my family enjoyed the pitter-patter of rain hitting the windows and splattering across the deck in between thunder so loud it shook our souls. A solemn reminder that within the magnificent order of our world, there are powers far greater than man.
An excellent way to drift off after a long day of travel.
So sleep, yes… but then, over the next two weeks… we’ll fish hard.
A Plan for Fishing the Manitowish Chain
There are several techniques that have worked for us over the last 30 years fishing the different lakes of this northern chain. Standouts. The cream always rises to the top. I’ll briefly cover our favorites before explaining a newcomer this year… The Snakebite Rig. Every technique listed here was utilized over the course of this trip.
Top Fishing Techniques for Lakes near Minocqua, Wisconsin
… we slayed ’em this year… I caught the MOST… but…… Mama had the BIGGEST! ATTA GIRL!!
MEAT: a simple jig and leech or a weedless jig with a crawler will get the job done when everything else seems to get ignored. The Slo-Poke Walleye Kit is a great place to start, and if the panfish start attacking your live bait too much, don’t be afraid to fish small plastics. Hit the weed edges and rocky shorelines early in the morning, look anywhere from 5 to 25 feet deep.
Small Stickbaits on a weedless wacky hook are a great way to work the weed beds while fending off the aggravating panfish. I stick with baits around 4″ and usually use natural colors – the water here is clear. If you don’t need a weed guard – don’t use one!
If the fish are active and the water temps aren’t too hot, both pike and smallmouth will absolutely decimate a River2Sea Rover 98! It’s a great way to start your morning, and other small walking baits like a Zara Spook Jr can be dynamite! (For extra fun, rig up a Pop ‘n Drop and go to town!!)
Later this month I’ll break down my Wisconsin Base Box. It’s more involved than this list. It’s also more involved than the Muck Base Box we covered a few weeks ago, but have no fear – the items mentioned above will give you a major leg up on your buddies!
Now… let’s talk about the new guy…
What’s The Snakebite Rig?
The Snakebite Rig is something that’s been getting tossed all along the tall, overhanging shores of Illinois. While exploring, I came across some clear lakes that had an interesting mix of tall, stringy grass beneath overhead muck. The Back-to-Back Uni-Knots used for my fluorocarbon leaders (to make my braid less visible) suddenly became a problem. Their forward-facing tag is a muck-magnet.
In a Back-to-Back-Uni-Knot, the blue fluorocarbon (hard) tag end faces forward.
I would cast, start my retrieve, and within mere inches a large ball of snot and goop would form right at the connection, making it impossible to cleanly work my rigs through the cover. On top of that, the tag on the Uni-Knot next to my hook also gunked up, and as my plastic whatever would slip below the surface, it would become unusable after a crank or two of the handle.
Many popular knots have forward-facing tag ends.
3 popular knots. 3 forward-facing tag ends.
There was no way to cleanly snake plastics through this mucky grass… very frustrating! I needed to come up with the most weedless, muckless setup that was also strong enough to hoist bass up onto the overhanging bank. (My beloved weedless wacky hooks and 8lb test had snapped, bent out or popped free one too many times while trying to haul nice bass up and out of the water. Just too much weight, so the hook needed to be a bit stronger as well – but retain a small profile.)
That was the goal, and The Snakebite Rig was born.
How to Set Up The Snakebite Rig
When you set up your Snakebite – the connectionsare as important as the components:
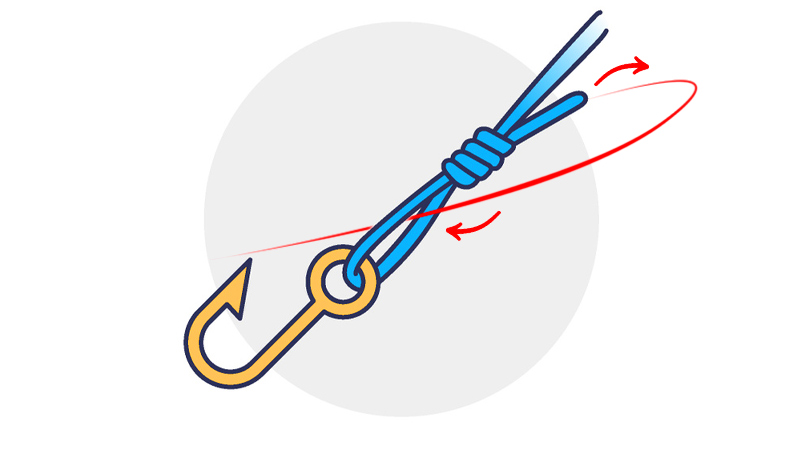
Spool up with 30 pound braided fishing line (or stronger) and tie on a high quality 15 lb fluorocarbon leader (or stronger) using an Improved Alberto Knot. This creates an extremely small, smooth connection that will not pick up muck. The fluoro is folded back onto itself, and the forward-facing tag is soft braid. This fixes the problem of the Back-to-Back Uni-Knot. (Adjust your leader length based on water clarity and cover conditions.)
Heavy line is important.
This rig will go where a shaky head or a jigworm with an exposed hook won’t, but it’s not a power presentation. It’s semi-finesse, but still needs to give you the power to hoist large bass up onto overhanging banks. The fluoro leader offers abrasion resistance too, and it won’t get spun up around branches as much as straight braid – double bonus!
Improved Alberto Knot connection with no forward-facing fluoro tag. The 30 pound braid to 15 pound fluorocarbon used here still has an extremely small profile. A slight tag has been left on the braid, which will fold back onto itself.
Next, we need a weedless hook and weight system. The first thing that comes to mind is that good ‘ol Texas Rig… but we don’t want that free-floating weight or the hassle of adding a bobber stop / peg. Plus, we need a more compact hook, not a monster 5/0 EWG. This is the perfect rig to pair with some Z-Man Finesse BulletZ. The Z-Man Finesse BulletZ have a fixed weight and the 1/10th or 1/15th ounce sizes are usually enough to get the bait down into the cover without burrowing it into the bottom too fast. This gives fish time to see – and hammer – your offering. The recessed eye, stationary weight and smaller hook size slip through cover beautifully. (Note: the Z-Man Pro BulletZ feature much larger hooks and some heavier weights, so make sure you don’t grab these by mistake, unless you want to upsize the entire rig.)
This must be connected to your fluorocarbon leader using a Weedless Uni-Knot, which keeps the fluorocarbon tag end facing backwards – just like our leader connection.
These days I tie all of my Uni-Knots weedless, because it only requires one extra pass:
A single, extra pass before you cinch your knot will make it weedless.You can see the tag is now facing back after it’s been cinched down tight.
Finally, select your favorite floating worm or plastic (yes floating – we want this to sink slowly) and rig it – you guessed it – weedless. Push the tip of the hook through the bait and bury it just slightly below the “skin” on the opposite side so it doesn’t catch anything (“texposed”). This gives you better hooksets than what you would experience trying to drive through the entire plastic.
I prefer to use baits that already contain salt, then add additional scent. This mimics blood (something that is alive) while masking human stank. Bang StickZ. Dr. Juice. Get some.
The Snakebite Rig was designed to be fished in clear to slightly stained water, with a layer of muck or algae over the top of tall weeds or grass. This is where it shines. The small hook, fixed weight, and knots with hard tag ends all facing back allow the angler to get through the algae, then snake through the weeds or grass below with ease.
The floating plastic helps to keep the bait up off the bottom, and the salt and scent give you an extra few seconds to set the hook.
Cast it out and start to work it back with slow drags or twitches. A faster retrieve will bring the bait back just subsurface. A slow, deliberate retrieve will allow you to drop the bait down into holes or transitions. If you come across a spot on a spot, like a stump or boulder or clearing within a larger weed bed, allow The Snakebite Rig to sink all the way to the bottom of these areas and entice fish.
This works great for largemouth bass. It’s why it was developed.
Quality Largemouth Bass on The Snakebite Rig
Using a Snakebite Rig on Wisconsin Bass
The Snakebite Rig is also extremely useful when you need to fish big weedy flats for smallmouth bass in Wisconsin, and it came into play for me more than once this year.
Was it developed for bank fishing? Yes. Does it work when fishing from a boat as well?
Sure does.
Many techniques catch bass (once you find them) in Wisconsin. Our favorites are listed above, but things like weather, water temperature and clarity are always a major factor. We’re usually visiting in July – so temps can be anywhere from 70° to 84°… it’s the warm water period. Smallmouth bass can be shallow, but we also find them deep, along with walleye and the occasional pike or muskie – depending on the time of day.
Typically, we’re fishing anywhere from 5 to 25 feet deep.
When we head out early in the morning, Dad and I like to start by fishing big weedy flats with sporadic wood and rock cover that sits on the inside edge of the weeds. I’ll throw topwater towards the bank, like a Rover 98 or a Pop ‘n Drop, and Dad will usually fish some combination of jig & meat off the other side of the boat.
This works well.
Dad with a 4 pound smallmouth near Minocqua in the morning (leech & jig).AJ with a 3.5 pounder. The Pop ‘N Drop can work all day long, depending on the conditions.
As the sun starts to get higher and higher in the sky, we move out. If it’s midday we’ll actually head way out to fish weedy, rocky humps in 20+ feet of water – but before that, we’ll work the back side of the weeds that were productive in the morning. Dad will continue to work his jig & meat off the back edge, but I like to keep working out from the middle of the weeds – right in the thick of it.
This year I realized The Snakebite Rig is prefect for working through big weedy flats, and then coming out and OFF of them, dropping down along the backside and working out a bit towards deeper water. This was especially effective on weed clumps sitting at the top of a rocky point coming out from shore, and using this technique allowed me to pick up extra smallmouth bass both IN and OUT of the weeds with MINIMAL SNAGS.
Outstanding.
Snakebite Rig Smallmouth Bass
Snakebite Rig Smallmouth Bass
Snakebite Rig Smallmouth Bass
In terms of rigging up for smallmouth bass? It’s all the same components and knots, just downsize your plastic and your line accordingly. You’ll catch fish of every size – and you might even land a few bonus species…
Snakebite Rig Crappie
Snakebite Rig Bass
Snakebite Rig Bass
Add The Snakebite Rig to your bag of tricks – and let me know how it goes.
You’re gonna catch more fish.
Tight Lines & Godspeed, Patriots.
🎉 Congratulations! You just successfully sent {{emails_count}} email(s).
One Final Note on the Selection of the Improved Alberto Knot over The FG Knot or the Yucatan Knot…
Believe me… I tested ’em all. We covered the Back-to-Back Uni-Knot above (the Improved Alberto comes through the guides easier, and picks up less muck). The FG Knot has a small tag but it also faces forward – not to mention the simplicity of the Improved Alberto makes it much more attractive than the FG in this scenario.
FG Knot: the juice ain’t worth the squeeze…
Finally, the Yucatan Knot is similar to the Improved Alberto, because it also requires you to fold the fluorocarbon back on itself when tying the knot – but I tried to tie this knot several times – with MONO even – and it failed every single time. Every single time! Musta tied 25 knots. All failed. User error maybe… so if you have confidence in a Yucatan Knot it seems like it would work fine for this application, but for me – I’m sticking with the Improved Alberto Knot.
Get Articles & Videos First
Catch More Fish Than Your Friends. Laugh At Their Tears.
Your support directly funds the creation of weekly articles and videos that promote the development of better anglers and better men. Our country (and our kids) need both. Please share this site, and consider a monthly, weekly, or one-time donation. You are helping us make a difference!
Your support directly funds the creation of weekly articles and videos that promote the development of better anglers and better men. Our country (and our kids) need both. Please share this site, and consider a monthly, weekly, or one-time donation. You are helping us make a difference!
“But how is this possible with a minimalist approach!? With limited gear?!”
It’s possible, because of the minimalist approach. With two jobs (one in website development, the other business consulting), prison ministry work, 4 boys and a wife – life is hectic. If Odin is with us, I might be able to fish for a few hours twice per week. Max. Had we not spent the last several years fine-tuning presentations, tactics, locations, gear, checklists and pre-trip processes, 400 decent bass this season in our waters would be out of the question.
We’re off to an outstanding start. May will end with 93 in the bag – the biggest just under 4 pounds, second place well over 3, plus countless bass over 2 pounds have briefly boarded the kayak, the jon boat, or joined me on the bank.
A quality kayak bass over 3 pounds in a new, remote fishing location.The biggest so far was just under 4 pounds, at another new remote location I call Snapping Turtle Pond (videos of all these trips on the way later this year).
The best presentations for Illinois bass fishing in May?
Here they are in reverse order, ranked by productivity (quantity).
Well… that’s why it was developed… but since its inception the true versatility of this finesse system has become increasingly apparent…
The F4 Rig Has Proven to be Surprisingly Versatile & Effective
In the past, I’ve utilized this rig in mucky water. That’s what it was designed for – fishing Illinois muck, but the other day I found myself in an extremely clear borrow pit (over 15 foot visibility, easy) with strikingly steep banks. Steep banks usually mean one thing: that slope continues underwater, and sure enough, you could see the lake bottom dropped to ten, twelve, maybe even twenty feet very close to the bank.
We’re talking about an underwater drop much steeper than the pitch on the roof of my house.
Steep!
The bottom was a mixture of mud and weeds… but not tall weeds. Some sort of bushy pond weed. It was stacked up no more than a few feet high, and you could see it matted all over the steep slopes with a clear transition to mud and rock about 15 or 20 feet below. Big sections had been removed between depths from 3 to 8 feet where the bass had made oval-shaped beds right on the steep walls – really an interesting situation.
I could see big, dark shadows moving around all along the lower transition, and several feet up into the overhangs, nooks & crannies of the mats as I quietly paddled about…
The bass were deep, and thick, all throughout this stuff.
So how do we get to them, in a kayak mind you, in a way that allows us to fish, not spend the morning picking these bushy weeds off of our hook after every cast?
Here’s how.
Try This Rig when Fishing Steep, Weedy Banks in Ultra-Clear Water
In clear water, you need light line on a spinning setup (8lb fluoro or less).
This means you also need a light wire hook.
A steep bank means you need to get down to the depth of the fish.
But bushy bottom is something you don’t want a weight to pull your hook into.
So place a weight about 3 feet higher up on the line, and use a floating bait to stay above the snags.
Take a floating worm or plastic, and rig it wacky with a light wire hook (weedguard is optional).
On your line, you’ll place bobber stop #1, followed by a 1/16 to 3/16 ounce bullet weight, followed by a bead, followed by yet another bobber stop. This will allow you to move – or pin – your weight in place. The bead will help you see where you’re at underwater, and if you leave some space, you can clack it against that bullet weight for a subtle attractant.
That weight will slowly sink, dipping below the height of the bushy weeds on the bottom, but that floating bait will stay up above – along with your hook – allowing you work down the steep banks with long pauses as these fish inspect your offering. If something it stuck, it’s the sinker, not the hook, and you can easily dislodge and focus on fishing – not weed removal.
Watch your line. When you get a strike, you’ll feel a slight tick tick and your fluoro will twitch just a bit.
Reel. Fast.
Reel until you feel weight, then lift your rod tip straight into the air. Do not snap the rod or you’ll pull the bait straight out of their mouth – especially because you’re using that little light wire hook (a necessity with such clear water) and because that weight placed a few feet away from your bait puts slack in the line.
When you feel a strike, you need to reel fast until you remove the bow caused by the weight sinking below the bait – but once you do, if you feel weight… you got ’em!
What Makes the F4 Rig Different than the California (or Mojo) Rig?
Great question.
As you can see below, the California Rig consists of a leader to a hook, with a bobber stop below a few beads and a bullet weight. The Mojo Rig is an updated version, utilizing a cylindrical weight and a single bobber stop with no bead for stealth.
Both of these rigs allow you to keep your weight away from the hook, but they do not allow you to pin your weight into place like the F4 (unless you use a Mojo sinker with an internal rubber stopper, which then loses the ability to move freely up and down the line).
The F4 sandwiches a bullet weight between two stops so you can pin it anywhere on your line. You can rig it like a lightweight Carolina Rig, or, push the weight down close like a Texas rig – you can even pin the weight in place without cramming a toothpick in it. You can silence the weight & bead anywhere on the line by pushing the bobber stops in tight, or, allow for noise by leaving space. Not to mention, you can tie the F4 Rig with a single Palomar knot.
Pin it…… or slide it…
No extra hardware. No special knots. Any kind of plastic. The ability to adjust your presentation on the fly without re-rigging… we’re talking Maximum Versatility.
I’ve also used the F4 in shallow creeks and had success:
Fishing an F4 Rig in 100° HeatClick the banner to jump to Stars & Bars Fishing on YouTube.
Later this season I’ll publish the video of this modified rig in action – but I had to share it with you now. Make sure you tuck this option into your bag of tricks. It’s a minimalist approach that will put more fish in the boat.
I guarantee it.
Tight Lines & Godspeed, Patriots.
Get Articles & Videos First
Catch More Fish Than Your Friends. Laugh At Their Tears.
Your support directly funds the creation of weekly articles and videos that promote the development of better anglers and better men. Our country (and our kids) need both. Please share this site, and consider a monthly, weekly, or one-time donation. You are helping us make a difference!
The Pop ‘n Drop has been one my my favorite techniques to fine tune this year. Not only has it been fun – it’s been productive. Two of my best smallmouth bass fell prey to this contraption. Absolutely hammered it. However, like all presentations, you have to use it in the right location, at the right time.
This bass smashed the dropper by the inside edge of shallow weeds in a spring-fed Wisconsin lake.
Pop ‘n Drop Wisconsin Smallmouth Bass
This one? Ignored the dropper – smoked the popper – in a skinny creek no more than 2 feet deep.
Pop ‘n Drop Illinois Creek Smallmouth Bass
Both fish were approaching 20 inches. Fat. Three ‘n change. Easy.
The first attempt combined a Z-Man Pop Shad with a large Trokar MagWorm B.A.R.B EWG Hook. All good there, but then I needed a way to attach my dropper line. Not wanting to hang it off of the eye of the hook, or tie it directly to the hook shank, I slid a large split ring over the barb of the hook and held it in place with some dental floss & super glue.
The performance was dismal.
Completely killed the action of my popper, and slowly sunk with medium-sized plastics…
Big fail. Hard pass.
Scrap it.
The second mod was a bit cleaner.
By placing a barrel swivel on the shank of a new hook I was able to slip just over the barb without bending it down, and tie my dropper to the lower portion. This allowed my connection to be moved, and it wouldn’t twist – both good things. Then I placed a rubber collar (for jig tying) on the shank, to hold the swivel in place and make it even less likely to pop off during a fight.
The collar wasn’t snug, which let my dropper connection move all over the place. The Pop FrogZ were also not as buoyant as I had hoped. They too got pulled under by the extra hardware and stickbait dropper…
Dang it. Fail #2.
Progress, but still a failure. Scrap it.
So through these tests, I learned that ElaZtech will not float as much weight as I thought… and that makes sense. You want a fish to be able to easily pull your bait underwater. It’s not meant to be a bobber.
I also learned that making a “heavy cover” version is rather difficult. Even if you balance the weight and the pop with the drop so it all behaves – you still have the issue of dragging a trailing plastic over muck, which fouls up easily.
The best combinations that I have worked with so far have been built upon hard-bodied topwaters with one treble hook removed, and a dropper tied straight to the lure. The only issue is that this limits you to the outer edges of cover, or working over the top of deep weeds, because of the exposed treble.
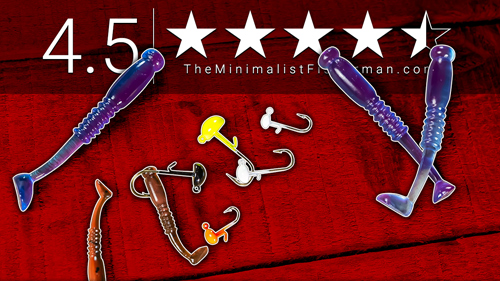
The best trailers? Any one of these 4 options in a smaller size: The Top 4 Stickbaits for Largemouth Bass Yes, they work on smallmouth too. Just make sure that the weight of the stickbait you select doesn’t pull the popper underwater. Zoom Zlinkys are a favorite of mine, but they contain a lot of salt. Choose your dropper carefully!
I still need to find a way to fish this in the muck, because that’s what we have here. I have a Vicious Hollow Body Frog on the workbench to work with next…
Your support directly funds the creation of weekly articles and videos that promote the development of better anglers and better men. Our country (and our kids) need both. Please share this site, and consider a monthly, weekly, or one-time donation. You are helping us make a difference!
Yesterday, I used this simple 4-step plan to get out of my fishing slump. Not only did it help me catch bass – it helped me methodically break down a local lake that has changed drastically due to the fact that all of the large algae pods the bass used to get up under close to shore are gone (removed with chemicals).
In short – the plan worked. Here are the 3 best from yesterday:
Largemouth Bass #3 – 2.25 lbs
Largemouth Bass #2 – 2.5 lbs
Largemouth Bass #1 – Just Under 3 lbs
This was the key:
My downsized wacky rig was weedless, but I used heavier tackle and added a little bit of heft. There was a swivel between my braid and fluorocarbon leader for weight, plus a 1/32 ounce bullet weight. (Yes, you read that correctly – tiny!) This allowed me to cast a bit further, fish a bit faster, and find the deep grass edge these largemouth bass were set up next to.
It worked again and again (smaller fish not pictured). Here was the gear:
This got me thinking about a video I did a while back, when I was using VMC Weedless Wacky Hooks with a wire weedguard exclusively. I missed a lot of fish using these… but I still have them on hand for the heaviest of cover. It’s worth considering so you’re a bit more versatile… but remember… only get ’em if you’re gonna use ’em!
Click the banner to jump to The Minimalist Fisherman on YouTube.
Even though it’s a bit older, if you have any feedback, I’m all ears.
Hope you fellas get some fishing in this weekend.
Tight Lines & Godspeed, Patriots.
Get Articles & Videos First
Catch More Fish Than Your Friends. Laugh At Their Tears.
Your support directly funds the creation of weekly articles and videos that promote the development of better anglers and better men. Our country (and our kids) need both. Please share this site, and consider a monthly, weekly, or one-time donation. You are helping us make a difference!
Oh Mylanta – this is cringe-city! Lord… I was also like 15 pounds heavier. At least.
You can tell in these older videos that I was completely depressed. Quite literally sad, as my business and home life were both on the rocks. There are a few jokes & smirks, but you can actually feel the anxiety and stress bubbling under the surface. Fishing was something I was trying to focus on to keep busy, to learn more about, to help me lay off the bottle.
So I post this today with two hopes:
I hope that my inexperience and funny mistakes will inspire youto create. We’ve talked about how Motivation is Worthless, and Developing a Drive is Necessary, but being willing to suck and look like an idiot in public – for a long time – is also necessary. I still have a lot to learn, but just remember: if you don’t thicken your skin you’ll never create anything. That would be a shame.
The Pop ShadZ have been a staple in my Base Box for almost 3 years now. With that in mind, it’s worth watching this video to glean the tidbits that make it such an interesting largemouth bass bait.
Click the banner to jump to The Minimalist Fisherman on YouTube.
Even though it’s a bit older, if you have any feedback, I’m all ears.
Hope you fellas get some fishing in this weekend.
Tight Lines & Godspeed, Patriots.
Get Articles & Videos First
Catch More Fish Than Your Friends. Laugh At Their Tears.
Your support directly funds the creation of weekly articles and videos that promote the development of better anglers and better men. Our country (and our kids) need both. Please share this site, and consider a monthly, weekly, or one-time donation. You are helping us make a difference!
The past few weeks have been tough here in Illinois. Algae is thick. Stinky. It’s disgusting. Fishing has been up and down, but we’ve managed to smack a few largemouth bass on a Z-Man Pop Frog.
Yet… there’s a problem…
His pants keep falling down.
It’s weird, but imagine your topwater frog has pants.
Every time you pop him over the top of the thick algae, they start to sag.
Stick with me.
I have not been drinking.
This is an unacceptable fashion faux pas, but more importantly, it makes your topwater far less effective. As the rear end of the frog slides down the hook after every *POP*, you’ll find yourself spending more time resituating the bait than fishing it.
Take your floss, tie a granny knot, and wrap it around the shank 15 – 20 times, right below where the plastic will sit on your hook. (I’m using a 4/0 Eagle Claw Trokar Magworm Hook with this plastic, and a heavy duty – short – leader made from 30lb J-Fluoro. Fluoro sinks, so only use a bit.)
Hit the floss with some super glue, and leave it sit until it dries. If you don’t like the white color on the hook, go over it with a Sharpie.
Z-Man Pop FrogZ Mod by The Minimalist Fisherman / AJ Hauser
ElaZtech is super stretchy.
It will pass over the “bump” we’ve added with relative ease, however, just this slightly raised rough patch on the hook will prevent the plastic from sliding down the smooth hook shank after every single twitch.
Hooksets, you ask?
Not a problem.
I only rest my hook in the slot on the top of the bait, I do not bury the point back into the plastic (what some call rigging it “Texposed“.) The plastic stays in place with the floss underneath the bait, which lets the hook slot do it’s job and keep the bait weedless even without “Texposing” the plastic, allowing me to make good, clean, solid hooksets!
Here are a few more quick pics to show you how mine looks:
I learned this method from the great Richard Gene the Fishing Machine. The legend uses floss and super glue on smaller jigs to lock plastics into place, and prevent them from sliding down the shank.
Same concept, slightly different use.
It’s made life easier for me so I had to share. Let me know if you can put it to work in the field!
Your support directly funds the creation of weekly articles and videos that promote the development of better anglers and better men. Our country (and our kids) need both. Please share this site, and consider a monthly, weekly, or one-time donation. You are helping us make a difference!
“Finally… finally, back in the creek… it’s been too long… “, you mutter to yourself.
The wind is lightly blowing on this warm June morning in Illinois as the kayak slips silently into the slow-moving water. You begin to plunge the paddle below the surface and make a quick note on clarity.
“A foot of visibility, maybe two“, you again mumble out loud, remembering the rainfall from earlier in the week, “with this sediment I’m not sure where the smallmouth are, but there is a good chance they’ll be in tight to cover.“
You start to make your way upstream, against the current.
Left. Right. Left. Right. Left. Right.
The methodic movement is almost enough to put you to sleep. Blades dipping below the surface one after the other, sparse droplets sprinkling down each time you lift. Left. Right. Alternate. Repeat. At times you scrape the rocky bottom as the creek bed comes up within the runs between the riffles and pools.
“Might as well start casting here“, you say as you arrive at the shallow end of the first pool, “I can work my way up to the riffles, then lift the kayak above my head and hike to the next run… now we gotta find the fish.“
Smallmouth bass fishing presentations flood your mind:
A jigwormis always a great option but it’s so slow, doesn’t allow you to really cover water. A swim jig lets you cover water, but they’re clunky and don’t look natural in this stream because of their size. An inline spinner might be better… maybe a small swimbait is the right option… but maybe not… can they see it and feel it from far enough away in the sediment? Topwater is always fun, but it seems like the topwater bite is always hot or cold – and with limited time we need something that is versatile. Efficient.
“Can we do two things at once?” you ask yourself? “Maybe… combine a few items? Wait… what if we…“
Grabbing a small pair of pliers, you frantically get to work on your creation:
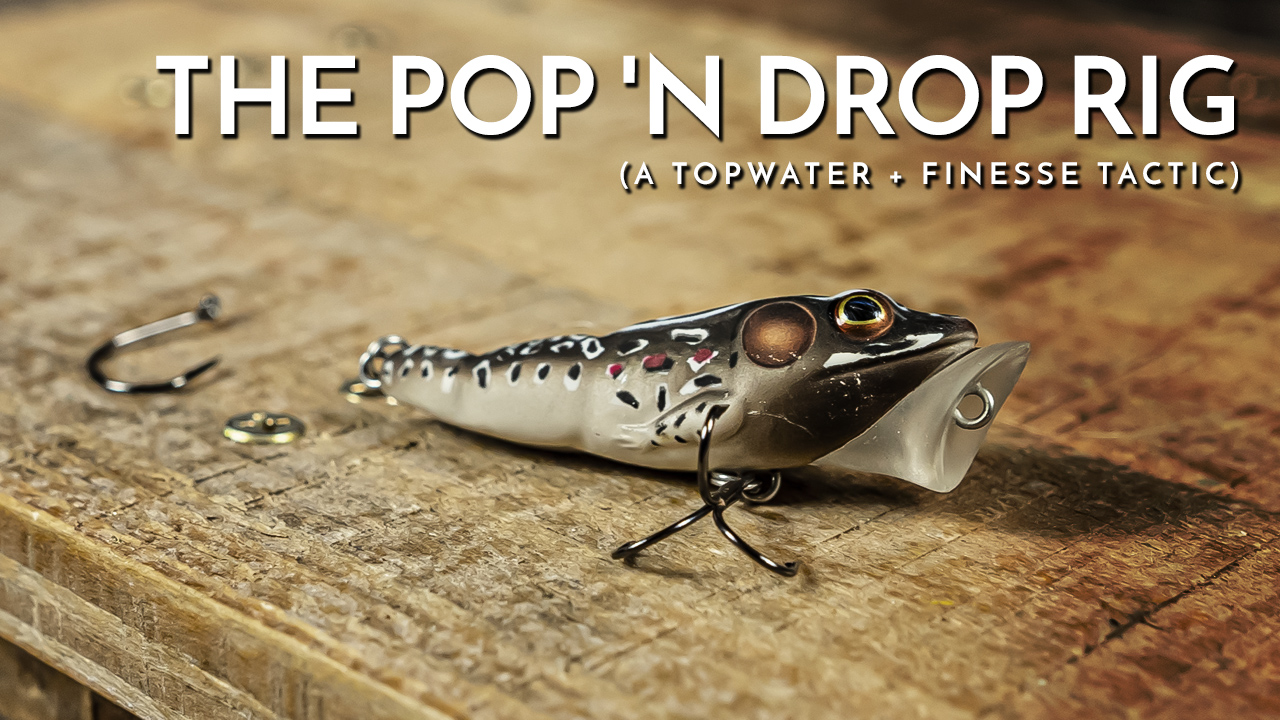
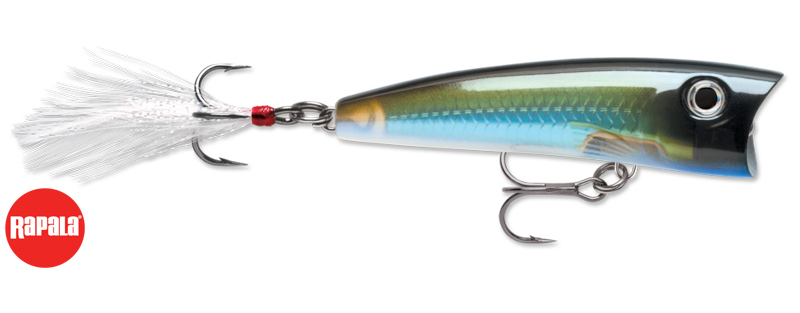
First, let’s snip the back split ring off of a Livetarget Popping Frog (which is similar to a Rapala Skitter Pop) to remove the rear treble hook. Then we’ll strip 3 feet of line for a dropper. Done. In your head, you envision the dropper holding a trailing plastic – something that could look like it’s chasing the popper, but also settle a foot or so below the surface (held in place, suspending seductively) tempting fish that are not inclined to commit to a topwater strike. A quick palomar knot attaches a light wire wacky hook to one end of the dropper, and another attaches the line to the popping frog where the rear treble was seconds ago. A Strike King 4″ Ocho in green pumpkin is attached to the dropper hook – wacky – of course.
“That should work“, you reassure yourself, looking at the goofy contraption you’ve just Frankenstein’ed while slowly floating in circles back downstream. “That… should… work?“
Hmmm… maybe…
A few quick paddles back to the spot you wanted to start exploring, and it’s time to cast.
WHIZZZZZZZZZZ-SPLASH!!
“Good Lord… not the most subtle presentation…“, you grumble as you begin twitching the popper back towards the kayak.
Twitch… twitch…. twitch… the popper spits and gurgles as the stickbait trails behind, settling underneath and making the popper sit out of the water at a 45 degree angle.
One cast. Two casts. A third…
“Man it looks pretty good, I mean it should wor-“
BOOM!!
A MONSTER creek smallmouth annihilates the popper, ripping the entire rig underwater as you lean back into a startled hookset. The abrupt commotion decimates the summer morning calm.
She starts to bulldoze with the current, ripping line off of your Abu Garcia Orra spinning reel, which makes a familiar sound that is both exhilarating and scary –
“Oh my – please God let me have a good hook in that beast! Don’t pop off. Don’t pop off!!”
The drag on the reel is absolutely screaming.
A jump. A splash. A turn. A doubled-over rod.
More bulldogging… she plunges beneath your kayak… but then… she starts to tire.
After another minute, the battle is over. You lip ‘er boatside and hoist her in the air to marvel at the impressive girth… the Pop ‘n Drop dangling from her mouth.
What a sight to behold.
Pop ‘n Drop Creator AJ Hauser with a Beautiful Smallmouth Bass
Believe it or not, this story is true, and while she would be the best fish on that warm summer morning, she wouldn’t be the last. The popper drummed up another bite or two, but many lesser smallmouth fell prey to the trailing wacky worm suspended in the current of the creek.
The popper almost acted as a bobber with hooks, but overall what I learned was this:
At certain times, in certain conditions, the Pop ‘n Drop is a great way to combine an aggressive technique with a finesse presentation that allows a fisherman to cover water quickly and pause in strategic locations to entice a bite.
Example:
Let’s talk a bit more about what it is, where it came from, and how you can make your own to catch more fish.
The Origin of the Pop ‘n Drop
The very first iteration of this presentation was made in my garage about 6 years before I actually got around to using it. I set it up with an old Rapala Skitter Pop, and hung it up on the wall. One day I tried it on a lake with largemouth, and I think I caught one small bass… but at that time I was still green – and we all know that there is no shortage of exciting, active presentations that we simply have to try.
I tried them all.
The original combo and cobweb collector.
This obsession took over, and ultimately culminated in me having too much stuff… which is also what led to the creation of The Minimalist Fisherman. I needed to reduce… and as “must have” presentations were tossed aside or retired, this one remained on the wall of my garage, covered in cobwebs…
For some reason, I couldn’t throw it away. It just always looked like it should work.
Last year, I began fishing creeks heavily after discovering 3 or 4 hidden locations in Illinois. Beautiful spots. Isolated, full of deer & songbirds, eagles and herons. Yet, it all came with a very frustrating learning curve, as current, sediment load & clarity changed substantially between trips.
More than one early morning outing were a complete bust due to changing conditions…
This year, after a few unproductive trips, I needed to figure out a way to fish multiple depths so that I could find the fish. Actively search, without skipping over semi-neutral bass. To date, jigworms and small plastics have accounted for about 65% of my catches – so it would be foolish to ignore them – but you have to work them slow, and they certainly don’t work well in chocolate milk! Then, I remembered the wall decoration…
Off the wall and into the frying pan! Or… something.
I took it down, and made a smaller version with a more natural looking bait that might appeal to smallmouth in skinny water, and it was game on.
You can mix and match any number of components when it comes to making your own unique Pop ‘N Drop. Chances are you already have everything you need to get started:
Part 1: A Floating Bait Start with a floating bait that can support the weight of the trailing offering & dropper you plan to use. I found that even something as small as the Livetarget Frog Popper could float a fluorocarbon dropper (18″) with a (sinking) 4″ Strike King Ocho.
Important note: if your trailing bait is too light, the wind will catch it on the cast and you will experience some pretty nasty snarls. Experiment until you find the right combination for your situation.
Part 2: A Dropper Line I like fluorocarbon. 10 pound test Seaguar Red Label works fine for smaller applications, and 20 pound fluorocarbon works when I am fishing largemouth, like in the video below. I have gone all the way up to 30 pound fluorocarbon at times, in very heavy muck where the bass aren’t line shy.
Important note: the other thing to keep in mind is your leader material. Even when I am fishing braid, I will use a small fluorocarbon leader to make my topwater connection less visible. It does sink so you have to balance everything. When I use the smaller Livetarget version on my creek spinning setup, I simply tie straight to my 10 pound fluorocarbon mainline – no leader required.
Part 3: A Dropper Hook Wacky hooks are the way to go. They are low profile and compact with wide bends. Light wire options easily penetrate fish jaws. If I am going to work over weeds or shallow timber, I might opt for a wacky hook with a weed guard on it. These days I’m using a Berkley Fusion19 Weedless Wacky Hook because the guard is made out of fluorocarbon. It collapses better than the wire guards on my Weedless VMC hooks.
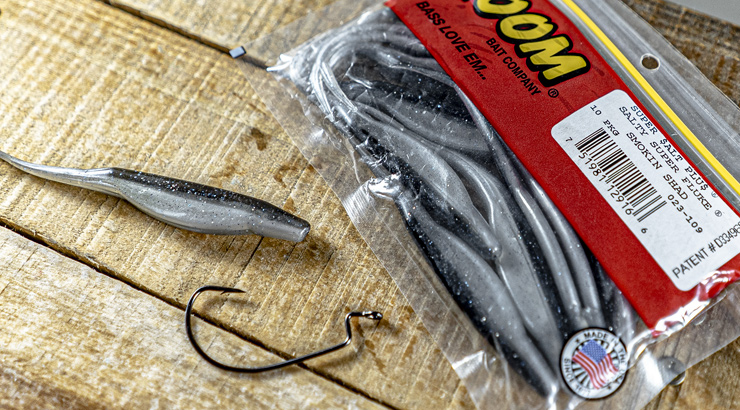
Part 4: A Trailing Offering Try a YUM Dinger, an Ocho, or if you want a trailer that floats – pop a Z-Man TRD on there and keep everything up on the surface. If you’re fishing a bigger floating bait, you can even get away with a full size stickbait – just make sure your line and hook are matched appropriately.
Pop ‘n Drop Heavy Cover Modification
One significant mod that I tried (with mixed results) was a Pop ‘n Drop with a Z-Man Pop Shad and a large single Trokar EWG hook. This left me nowhere to attach my dropper, so I had to put a split ring in some tubing used for spinnerbait trailer hooks, which allowed me to slide it onto the shank.
Pop ‘n Drop Heavy Cover Modification
From there I was able to attach a 30 pound dropper line to a weedless wacky. Kinda cool – but here’s the problem. Twitching the popper made the rubber tubing slowly move back on the hook, right up under the belly of the Pop Shad. When a bass hits topwater, the Pop Shad will not move down the hook on the set – meaning you will lose fish.
I lost a BIG fish.
I did manage to catch a good handful on the lower portion though, as I was able to use a full size Zoom Zlinky (with heavy salt) as my dropper offering.
The Zoom Zlinky is a soft, salty stickbait and a fish catching machine!
So this version, geared towards largemouth bass in ultra-mucky water, is going to require more thought… I’ll keep working on that. Just don’t make this mistake that I made with this version of the rig!
Give the Pop ‘n Drop a shot!
Don’t be like me – don’t take this presentation and use it as a wall decoration for years – get out on your favorite body of water and put it to work.
I’ve posted a few videos with this technique hard at work, and there are more to come…
Create your own combination, and let me know how it goes!
Pop ‘n Drop Finesse Topwater Technique by AJ Hauser
It’s March in the Midwest. Water temps have barely hit the 50° mark on the surface. In fact, just two weeks ago most of the small farm ponds that line the interstate were still sporting a layer of crusty, frozen slush.
Things are changing.
“Dang it…“, you grumble as you waste time picking the cold, messy wad of brown snot off of your exposed swimbait hook for the 563rd cast in a row. “It’s cold. I want to fish a jerkbait but can’t because of all the floating dead debris from last year. Those trebles don’t stay clean for a single twitch. How about slowly working a shaky head? Can’t. As soon as that weight lands in the muck on the bottom, it gets sludged up even if my hook doesn’t touch it… it’s too windy for a weightless Texas Rig, and don’t even think about dragging a jig… what the heck am I going to do?“
You violently shake your rod tip in an attempt to both relieve your frustration and dislodge the remaining mucky morsels from your lure, debating whether or not to make a long cast and let it sink, then work it back slowly – like you should – or make a short little pitch simply so you don’t have such a mess to clean off when you get it back to shore.
It’s a lose-lose proposition.
Your fingers are now cracked and bleeding in a few new spots. That’s what happens when you get them wet again and again and again in cold, windy weather. It’s tolerable when you’re catching fish, but today…
“This is not working… so now what!?”
Time to get creative.
The Origin of The F4 Rig
The F4 Rig (meant for Flexible Finesse Fluke Fishing) was something that I created out of necessity. During a particularly mild day in very late winter, my son noticed a small silver shiner with traces of light purple & blue coloring while we were walking around the lake. Just a few weeks earlier, this same lake had ice on it.
We’re not sure why or how this shiner ended up on the shore, but it told us something; the local forage is not limited to bluegill, crappie or even bullhead. These little 3.5″ silver shiners dart around the shallows, and there is a good chance that they are both the appetizers and the main course for bass of every size swimming in the lake.
The Forage: Small Silver Shiners
As the water continues to warm, bass will move up onto the large shallow food-shelf areas filled with these small, frantic baitfish. They’ll start to feed, and we need to present a small bait efficiently, but also cover a fair amount of water. So the question is this: how can we imitate the forage convincingly in a way that allows us to fish multiple depths, at multiple speeds with the least amount of mucky snags?
First: Select The Bait
The Z-Man StreakZ in 3.75″ is a perfect little pot-bellied shiner imitation in terms of both size and color (try “smokey shad” or “the deal” for a silver or blue tint). I’ve also had a lot of luck using green pumpkin in this lake, so my follow up of choice is The Standard Zoom Fluke in a two-tone “baby bass” color that has a bit more fleck and sparkle.
We’ve caught some great fish on this larger offering (as seen on Thursday Night Fishing) and later in the year the Super Fluke will definitely be paired with The F4 Rig, and a larger hook. It will come into play around rip-rap to mimic spawning or feeding baitfish, while helping us avoid some of the snags that come with using heavy, compact weights (jigs, shaky heads) around jagged rocks.
Another reason we’re going to experiment with a green color is because we definitely know that bass eat other bass… or… they try to eat each other… it doesn’t always work out too well… we found the proof of that last time, right after we found that silver shiner!
“I’ve made a huge mistake…” -Billy Bass
Also, it’s important to note that in this body of water largemouth bass are the primary, dominant predator. We have no walleye, pike, or muskie. This means we won’t get bit off, and the bass can (and do) use any depth and any location they want in the lake.
Having the flexibility to fish shallow or deep, fast or slow, calm or erratic is critical for maximizing our limited time on the water.
Next: The Complete F4 Delivery System
The F4 delivery system is incredibly simple. Dare I say… minimalist?
The BBFF (Build it. Break It. Fix it. Fish it.) Rod
ASSEMBLY: Grab your spinning rod, reel, and spool up with 8 pound test fluorocarbon. Fluoro will sink (helping your bait get deeper, faster) and give you greater sensitivity and power on the hookset compared to mono. It offers the most abrasion resistance around rocks, and is much less visible than braid. Low visibility is key, because we need the option of stealth. Attach the components (in this order) to your line:
Add your favorite soft plastic. Fish. Enjoy. Repeat. Tell your friends. Or maybe don’t.
Any plastic will work – but The F4 Rig was originally designed for smooth, snagless fluke fishing.
Keep reading – there are several nuances to keep in mind and countless ways to fine-tune this rig so you can maximize your time on the water!
It’s like a Texas Rig… but it isn’t…
The original concept was to create a “finesse Texas rig” for fishing around all of the muck in my lake after a frustrating afternoon fishing with exposed hooks. I wanted the weight to move freely up and down the line – however – also needed to be able to “peg” the weight close to the bait if too much muck was getting picked up. The bobber stops give me the best of both worlds – allowing the weight to be pegged close to the bait, pegged away from the bait and further up the line, allowed to float freely, OR float within a dedicated range higher up the line, never coming into contact with the bait. This last option allows me to let the weight sink and land on the mucky bottom, but floating plastics stay slightly suspended and right in the face of curious bass – which is incredibly effective.
Never use toothpicks to peg your weight when you are using light line. You will compromise your rig.
It’s like a Carolina Rig… but it isn’t…
The Carolina Rig requires 3 knots and several additional components (weight, bead, clacker, swivel, leader, hook, bait… and again, 3 knots). They utilize a heavier weight and typically include a brass “clacker” somewhere between the weight, the bead and the swivel. Dragging a Carolina Rig on the bottom kicks up sediment and causes a disruption – it is suited for rocks & gravel, not mucky bottom.
The plastic bead between the weight and the lower bobber stop on The F4 Rig will give off a slight “click” if you need noise as an extra attractant (like in murky water or on windy days), but it is more finesse than that big ‘ol Carolina clack.
It’s like a Tandem Fluke (Donkey) Rig… but it isn’t…
Want to move faster to trigger bites? No problem. Twitch The F4 Rig along the surface to create the illusion of a baitfish chasing something small and edible as the weight and fluke bounce back and forth with every snap of the rod tip – similar to the triggering effect of a tandem fluke rig (aka the Donkey Rig or Double Fluke Rig).
It’s like a Split-Shot Rig… but it isn’t…
Split-Shot Rigs are a great option around rip-rap or when you’re targeting finicky bass. They are not a great option around muck and weeds – it is incredible how much muck and debris the jagged, pointy edges of the traditional easy-pinch removable sinkers will pick up on a single cast. And slipping through the suspended debris without getting hung up?
Not gonna happen.
The bullet weight on The F4 Rig is much more streamlined, allowing the angler to make repeated muck-free retrieves.
It’s like a Mojo Rig… but it isn’t…
The Mojo Rig is similar; a hybrid rig between the Split-Shot Rig and a Carolina Rig. Mojo Rigs utilize a cylindrical weight and a single rubber stop between that and the hook. They are silent. By using a bullet weight and a bead, we can create space on The F4 Rig to add subtle noise when needed, push the stoppers together for complete stealth, or push our bobber stops down to the hook to fish a traditional Texas Rig with the weight pegged or free-floating.
A super-fast modification that takes seconds without requiring any retying – complete with bullet weight.
The F4 Rig was born out of necessity. It stays weedless. It creates noise. It can be silent. If you’re using a floating plastic it stays off the bottom. It’s flexible. It allows you to experiment with different leader lengths (from several feet to zero inches) without retying. It’s subtle. It’s erratic.
It’s a Flexible Finesse Fluke Fishing delivery system, and it will put more bass in your boat.
The F4 Rig in use at a Small City LakeThe F4 Rig catches little largemouth bass…… and plenty of big ‘ol keepers!
Let me know how it works for you.
Tight lines!
Z-Man StreakZ Fluke for The F4 Rig Delivery System created by AJ Hauser: Flexible Finesse Fluke Fishing
Today we’re going to go over a secret Ned Rig modification that I came across while puttering about on YouTube. The modification video was posted by Randy Blaukat, and his channel is simply called: Intuitive Angling With Randy Blaukat
Please make sure to give him a follow! I’ve enjoyed several of his videos since this one was suggested in my feed, and (if he gives me his approval) I’ll be sharing a handful of his helpful videos – and testing his techniques very soon!
A Secret Ned Rig Modification w/ Randy Blaukat
He starts off by saying that Z-Man products are not his favorite. I believe he is using a Z-Man Ned Jig in this video based on the light wire hook and the shape of the jighead, but the plastics he picks are where the magic happens.
The heavy salt in the Zlinky is key. By cutting the tail of the bait down to about 2 to 2.5 inches, Randy is able to rub the bait between his fingers and rough it up, bringing salt to the surface and creating a less shiny appearance.
Many anglers have told me that plastics can work better after they catch a few fish and start to get ripped up; they believe this is because it brings more salt & scent to the surface of the bait. This would be right in line with the modification.
Then, the tail is cut straight up to the hook with scissors, and the collar of the bait, near the jighead is trimmed flush. This gives the bait a unique look, and it also allows even more surface area to come into contact with the water and the mouth of the fish.
Finally, chartreuse or orange dye may be added to the tip of the tail, depending on the conditions. Check out Spike–It Dip-N-Glo for starters, to add scent and color.
Moving Forward
It’s amazing how such a small bait can be so effective. It’s also amazing just how many modifications there are for such a tiny delivery system. While Z-Man is famous for marketing the Ned Rig name, adding some sort of small jigworm to your arsenal will definitely help you land more bass – especially under tough conditions.
Pick the jig & plastic that look good to you – and get fishing.
Stacking up smallmouth bass on a Ned Rig in tough, hot conditions.